A Step-by-Step Guide
(Ideal for Beginners & Novice WordPress Users)
LESSON 1
Series: Create Your Own Online Digital Store
Have you been dreaming about creating your own online digital store such as Envato Market, Etsy, eBay, Amazon or Kobo?
Make your dreams a reality today by taking advantage of the power of WordPress and premium plugins to create your very own online digital marketplace.
We show you how in our step-by-step guide over the course of our ‘Create Your Own Online Digital Store Series’. Let’s get started:
What You Will Need:
- Domain
Can be purchase from your registrar such as Google or your hosting company.
- Website Hosting
Hosting is required to get your domain online. - WordPress Installation
Install WordPress on your domain once you have hosting. This can easily be done directly via Softaclous in your cPanel or hosting dashboard.
- Theme Installation & Setup
Install an online store WordPress theme of your choice. For illustrative purposes for our demo online store website we will be using the Attire theme from the WPDM team. - Install Plugins:
- Your Products (Photos of your products, product descriptions, prices, etc.)
About This Guide
Our comprehensive guide to creating your first digital online store is suited to both beginners and experience website designers. As such, we have divided the guide into several Parts. If you have already purchased your domain and installed WordPress, simply skip over the steps that cover these or navigate to the Part you are interested in.
Guide Content:
PART 1 – Install WordPress, Theme & Plugins
Ready?
Set!
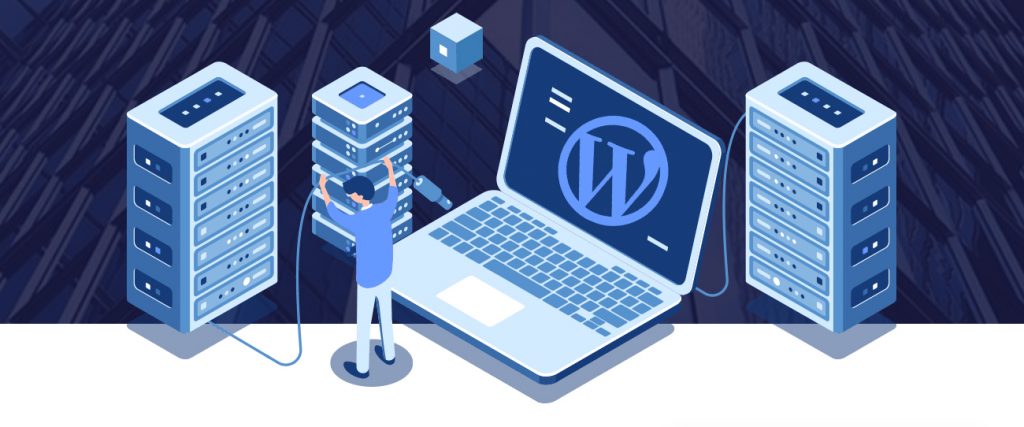
Let’s Install WordPress!
PART 1
– Install WordPress, Attire Theme & Marketplace Plugins
STEP 1 – Purchase A Domain Name (Website)
 1")
If you do not already have one, you will need a domain (website) for your online store. Choose a registrar of your choice such as Google or purchase directly from your current hosting company.
STEP 2 – Get Hosting For Your Domain (Website)
 2")
In order to get your domain online, you will need to have a hosting package for it. Consider companies that offer quality hosting that support an online store or marketplace, such a MBS Hosting or A2Hosting, to name a few.
STEP 3 – Install WordPress
Once your domain is connected to your hosting, you can install WordPress. Since every web hosting company is different, you will need to check what is the best method available for installing WordPress. Most often though, you will have access to either a 1-click WordPress Install option or Softaclous. For this blog, we will guide you through installing WordPress with Softaclous.
STEP 3.1 – Login to your hosting account, and navigate to the cPanel for your domain.
 3")
STEP 3.2 – Locate Softaclous and click on it to access.
 4")
STEP 3.3 – Choose to Install WordPress, and fill out the necessary information as per our guidance below:
 5")
1 – Choose the WordPress version to install.
2 – If you already have an SSL installed for your domain, select https. If you don’t have an SSL, choose http. (Though, it is advised to install an SSL at all time for an online store.)
3 – Select the domain to which you want to install WordPress.
4 – Do not add anything in directory. (Wp_ is usually there. Delete it.)
5 – Type in the name for your business.
6 – Type in the tagline for your business as it should appear on your new WordPress website.
7 – Choose a username
8 – Type in your chosen password
9 – Insert your email
10 – Select the language of your choice.
 6")
11 – This is optional if you want to activate a login attempt limit so that anyone who tries to access the admin area of your WordPress website will be logged out if the amount of login tries is exceeded.
12 – Choose this if you want the WordPress default Classic Editor activated. I would recommend to leave this unticked for now.
13 – Choose the name for your database as it will appear in your File Manager. Keep it short.
14 – Choose the table prefix for your database as it will appear in File Manager. Keep it short.
15 – Choose whether or not you would like to Auto Upgrade WordPress Plugins. This makes life a lot easier. I would recommend activating it.
16 – The same for Auto Update of WordPress Theme.
17 – Choose to where you want to save your automated backups.
18 – Choose how often you would like your site to be backed up.
19 – Select the backup rotation.
20 – Theme selection. You can opt to install a theme at this stage, but I would recommend not selecting any theme since there is something issues that can occur. Rather install your WordPress without a theme for now.
 7")
21 – Click on the ‘Install’ button and wait for the installation of your new WordPress website to complete.
STEP 3.4 – Done!
STEP 4 – Login To Your New WordPress Website
 8")
Once you have installed WordPress, you will receive your websites’ dashboard access (wp-admin) link. Example: https://yourdomainhere.com/wp-admin
 9")
Click on this link to access your WordPress website. You will be prompted to insert your username (or email) and password.
Congratulations, you are now logged in to your websites’ WordPress Dashboard, which looks something like the below:
 10")
STEP 5 – Install Your Theme
 11")
- Navigate to ‘Appearance,’ and then select ‘Theme.’
- For the purposes of this blog and our online shop demo website, we will be using the Attire theme.
 12")
Download the Attire Theme from the WP Download Manager team here: https://www.wpdownloadmanager.com/download/attire-allinone-wordpress-theme/
- Save the Attire theme to a location on your computer.
NEXT UP – Add your theme . . .
 13")
 14")
- Once your theme is downloaded, click on ‘Add New.’
- Select ‘Upload Theme.’
- ‘Choose File’ and find the Attire theme folder you just downloaded to your computer.
- Click on ‘Install Now’
 15")
- Once the Attire theme is successfully installed, click on ‘Activate.’
Well done!
Your theme is now installed.
STEP 6 – Update WordPress & Plugins
By now, you might have noted that WordPress is prompting you to update your WordPress, plugins and theme to the newest version. This would be a good time to do it before we proceed with installing the plugins needed to create our digital online store.
STEP 6.1 – Navigate to ‘Dashboard,’ and select ‘Updates.’
 16")
STEP 6.2 – Update WordPress
 17")
STEP 6.3 – Update all your WordPress Themes
 18")
STEP 6.4 – Update all the pre-installed WordPress plugins (although, you can delete Hello Dolly since it’s not of much use.)
 19")
Done!
STEP 7 – Install Marketplace Plugins
To create a marketplace, install the below two suggested plugins:
- WordPress Download Manager PRO
Login to your Download Manager Dashboard, and download your WP Download Manager PRO plugin. - Premium Packages (Direct Link: https://www.wpdownloadmanager.com/download/premium-package-wordpress-digital-store-solution/)
STEP 7.1 – Login To your Download Manager Account & Download PRO Plugin
Login to your Download Manager dashboard account. Upon login you will see your user dashboard such as below:
 20")
1 – Go to ‘Purchases.’
2 – Click on ‘Order Details’
 21")
- Click on the green button to download your PRO plugin, and save to a folder or location on your computer.
 22")
- Click on the blue button under License to get your license key.
 23")
- Open a word file or your notepad and copy the license key so that you can use it later. Save the file to the same location or folder as your WordPress Download Manager Pro plugin.
STEP 7.2 – Add WP Download Manager PRO to WordPress
With your PRO plugin downloaded, go back to your WordPress website dashboard.
Step 7.2.1 Navigate to ‘Plugins’ and click on ‘Add New.’
 24")
STEP 7.2.2 – Locate, Upload, Install & Activate The Download Manager PRO Plugin
 25")
1 – Click on ‘Upload Plugin.’
2 – ‘Choose File’ and find the WP Download Manager PRO plugin in the folder or location that you saved it to.
3 – Click on ‘Install Now’
– One the install is complete, click on ‘Activate Plugin.’
STEP 7.3 – Activate Your PRO License Key
After installing WP Download Manager PRO and activating your plugin, you will most often be re-directed to the screen below:
 26")
You don’t have to do anything on this screen. We will instead go back to our plugins page and activate our license key for WP Download Manager PRO.
Let’s do that now:
- In your WordPress dashboard, go to ‘Plugins.’
 27")
- Click on ‘Validate License Key.’
 28")
1 – Enter your License Key
2 – ‘Save Settings’
 29")
STEP 7.4 – Find, Install & Activate The Premium Packages Plugin
 30")
Once again go to ‘Plugins,’ and select ‘Add New.’
1 – Type ‘premium packages into the search bar.
2 – Find the ‘Premium Packages – Sell Digital Products Securely’ plugin from WordPress Download Manager, and click on ‘Install Now.’
- Once install is complete, click on ‘Activate.’
Congratulations!
You Have Completed Lesson 1
 31")
 32")